Captive Portal
Overview
Use this screen to configure captive portal settings for each interface. A captive portal is a designated login web page for client authentication before network access.
The policy can be applied:
• to a specific interface or zone
• with the walled garden feature
• to a specific client or group of clients
The policy can be configured:
• to exempt specific source and destination address objects
• to exempt specific type of traffic
• to use with HTTP or HTTPS server
What You Can Do in This Chapter
Use the Authentication Policy screens (Authentication Policy Overview) to configure the policy of the captive portal.
What You Need to Know
Walled Garden
With a walled garden, you can define one or more web site addresses that all clients can access without logging in. These can be used for advertisements for example.
Authentication Policy Overview
Use this screen to configure the authentication policy that the captive portal applies to control client’s access.
The Policy Screen
Click Captive Portal > Authentication Policy > Policy to display the Policy screen. Use this screen to configure the authentication policy for the captive portal.
The following table describes the labels in this screen.
Label | Description |
|---|---|
General Settings | |
Enable | Click to slide the switch to the right to enable the policy. |
Add | Click this to create a new entry. Select an entry and click Add to create a new entry after the selected entry. |
Edit | Double-click an entry or select it and click Edit to open a screen where you can modify the entry’s settings. |
Remove | To remove an entry, select it and click Remove. The Zyxel Device confirms if you want to remove it before doing so. |
Active | To turn on an entry, select it and click Active. |
Inactive | To turn off an entry, select it and click Inactive. |
Move to | To change a policy’s priority in the list, select the policy and click Move to. Enter the desired priority number for the selected policy and press [ENTER]. |
Search | Enter an item in the search box, then click this to display all sessions in the table below according to the item you entered. |
Status | This icon is lit when the entry is active and dimmed when the entry is inactive. |
Priority | This field displays the policy’s priority. The policies are applied in this numerical order. You can use Move to to change the order (priority). |
Interface | This field displays the interface or zone that enforces the policy. |
Sign In Method | This field displays the sign in method of the policy. |
Authentication Server | This field displays the authentication server that enforces the policy. |
Portal Type | This field displays the portal type of the policy. |
Description | This field displays the description of the policy. |
The Policy Add/Edit Screen
In the Captive Portal > Authentication Policy > Policy screen, click the Add or Edit icon to create or edit an existing profile.
The following table describes the labels in this screen.
Label | Description |
|---|---|
General Settings | |
Enable | Slide the switch to the right to enable the policy. |
Description | Enter a description for the policy. |
Criteria | |
Incoming | Select the interface or zone from the drop-down list to enforce the policy on the incoming traffic from the selected interface or zone. Select any to enforce the policy on any incoming traffic. |
Exempt List | Create a list to exempt specific traffic from the policy. You can exempt traffic by its source / destination IP address or service. Select an entry from the list to exempt specific traffic with that IP address or service from captive portal authentication. |
Add | Click this to create a new entry. |
Remove | Select an entry and click this to delete it. |
Type | Select the type of the traffic: • • • |
Object | Select an object of IP address or IP portal you created. To create an object, click Add Object. Add a new object when you select Source IP or Destination IP as the Type:  • Name: Enter the name of this object. It must begin with a letter and cannot exceed 31 characters. The valid characters are A-Z, a-z, 0-9, underscores (_), dashes (-), and dots (.). Spaces are not allowed. • Address Type: Select the address type of this object from the drop-down list. • IP Address: Enter the source IP address or destination IP address of the object. • Network: Enter an IPv4 address in CIDR notation, for example, 192.168.1.1/24. • Netmask: This field displays the subnet mask depends on the Network you entered. • Cancel: Click Cancel to close the window with changes unsaved. • Save: Click Save to save the entry. Add a new object when you select Service as the Type: 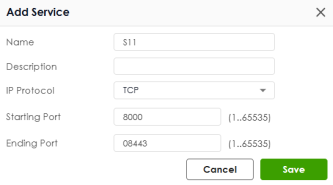 • Name: Enter the name of this object. It must begin with a letter and cannot exceed 30 characters. The valid characters are A-Z, a-z, 0-9, underscores (_), dashes (-), and dots (.). Spaces are not allowed. • Description: Enter a description for the object. • IP Protocol: Select the IP portal of the object from the drop-down list. TCP and UDP: If you select TCP or UDP as the IP Protocol, enter the Starting Port and Ending Port from 1 to 65535. ICMP: If you select ICMP or ICMPv6 as the IP Protocol, select the ICMP Type from the drop-down list. User Defined: If you select User Defined as the IP Protocol, enter the IP Protocol No. from 1 to 255. • Cancel: Click Cancel to close the window with changes unsaved. • Save: Click Save to save the entry. |
Edit | Select an entry and click this icon to modify it.  |
Remove | Select an entry and click this icon to delete it.  |
Save changes | Click this icon to save the changes in this row.  |
Cancel changes | Click this icon to cancel the changes in this row.  |
Enable Walled Garden | Slide the switch to the right to enable walled garden of the policy. |
Walled Garden List | Select the object you created. The selected objects will be applied to the policy. This list allows you to specify walled garden web site links, which use a FQDN (Fully Qualified Domain Name, consist of a host name and a domain name) for web sites that clients are allowed to access without logging in. |
Add | Click this to create a new entry. |
Remove | Select an entry and click this to delete it. |
Object | Select an object you created. To create an object, click Add Object. 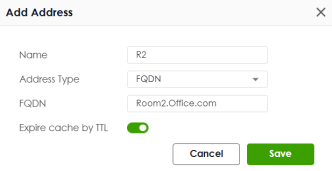 • Name: Enter the name of this object. It must begin with a letter and cannot exceed 30 characters. The valid characters are A-Z, a-z, 0-9, underscores (_), dashes (-), and dots (.). Spaces are not allowed. • Address Type: Select the address type of the object you want to create from the drop-down list. • FQDN: Enter the FQDN of the of a web site. An FQDN starts with a host name and continues all the way up to the top-level domain name. For example, www.zyxel.com.tw is a fully qualified domain name, where “www” is the host, “zyxel” is the third-level domain, “com” is the second-level domain, and “tw” is the top level domain. Underscores are not allowed. Use "*" as a prefix in the FQDN for a wildcard domain name (for example, *.example.com). • Expire cache by TTL: Slide the switch to refresh the data in the cache when it expires based on the Time-to-Live (TTL). The cached data remains valid for the specified TTL duration before it is refreshed or discarded. • Cancel: Click Cancel to close the window with changes unsaved. • Save: Click Save to save the entry. |
Edit | Select an entry and click this icon to modify it.  |
Remove | Select an entry and click this icon to delete it.  |
Save changes | Click this icon to save the changes in this row.  |
Cancel changes | Click this icon to cancel the changes in this row.  |
Sign In Method | Select the sign-in method of the policy. |
Authentication Server | Select the authentication server you configured in User & Authentication > User Authentication > AAA Server screen. The selected authentication server. |
Portal Type | Select the portal type of the policy. |
Redirect HTTPS | Slide the switch to the right to redirect all HTTP connection requests to the HTTPS server. |
Log | Select whether to have the Zyxel Device generate a log (log), log and alert (log alert) or not (no) when the policy is matched to the criteria listed above. |
The Advance Screen
You can use another server for clients to access the captive portal. Click Captive Portal > Authentication Policy > Advance to display the Advance screen.
The following table describes the labels in this screen.
Label | Description |
|---|---|
General Settings | |
Server Address | Enter the IP address of the service address. |
Redirect FQDN | Enter the FQDN for the server containing the captive portal. |
HTTP | Configure the HTTP connection of the captive portal. |
Enable | Slide the switch to the right to allow clients access to the captive portal web page using HTTP. |
HTTP Port | Enter the HTTPS port. This HTTPS server listens on port 1080 by default. If you choose a port already in use, you will see a port conflict message telling you to choose another port. |
Redirect HTTPS | Slide the switch to the right to allow only secure access by redirecting all HTTP connection requests to the HTTPS server. |
HTTPS | Configure the HTTPS connection of the captive portal. |
Enable | Slide the switch to the right to require clients access to the captive portal web page using secure HTTPS connections. |
HTTPS Port | Enter the HTTPS port. This HTTPS server listens on port 1443 by default. If you choose a port already in use, you will see a port conflict message telling you to choose another port. |
Authenticate Client Certificates | Slide the switch to the right to require the captive portal client to authenticate to the HTTPS server by sending a certificate. To do that the captive portal client must have a CA-signed certificate from a CA that has been imported as a trusted CA on the Zyxel Device. |
Server Certificate | Select a certificate the HTTPS server uses to authenticate itself to the HTTPS client. You must have certificates already configured in System > Certificate > My Certificates screen. |